Auto-signals Connector
What is the Auto-signals Connector?
The auto-signals connector acts as a bridge between MetaTrader 4/5 and MT2 Trading Platform.
It will send your MetaTrader indicator/s signals to the trading robot, which will automatically open the trades in your broker/s account/s.
There are currently two versions of the signal connector.
In our update 12.3 we launched our new connector, with an improved interface and simpler configuration. Due to the requests of some users, the old version is also available for everyone to use. In this documentation we will explain in full detail how to configure and use both connectors.
How to load it on Metatrader?
To successfully load the MT2 Trading files on MetaTrader, you must copy and paste or drag both the indicators and the libraries that include the MT2Trading folder.
- Locate the connector file ‘MTTrading_Auto.ex4 /ex5’ inside MT2Trading downloaded folder: ‘MT2Trading > MetaTrader > MT4/MT5 > MQL4/MQL5 > Indicators’.
- Copy the connector file ‘MT2Trading_Auto.ex4 /ex5’.
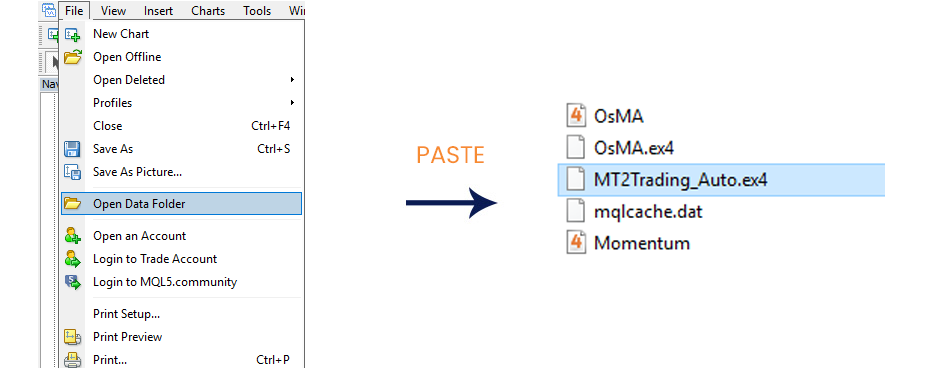
- Paste the file into MetaTrader folders. To do this go to: ‘File > Open Data Folder > MQL4/MQL5 > Indicators’.

Secondly, you must do the same with the Libraries files.
- Localize the library file “mt2trading_library.ex4/ex5” inside the folder: “MT2Trading -MetaTrader > MT4/MT5 > MQL4 / MQL5 > Libraries”.
- Copy the library file“mt2trading_library.ex4/ex5″”.
- Paste on MetaTrader, to do so go to: “File > Open Data Folder > MQL4 / MQL5 > Libraries”.
How to open it on MetaTrader?
Once you have the connector file inside your MetaTrader folders, proceed to open it on a chart.
- Open a new chart and choose your desired timeframe.
- Open the browser: Pressing CTRL + N.
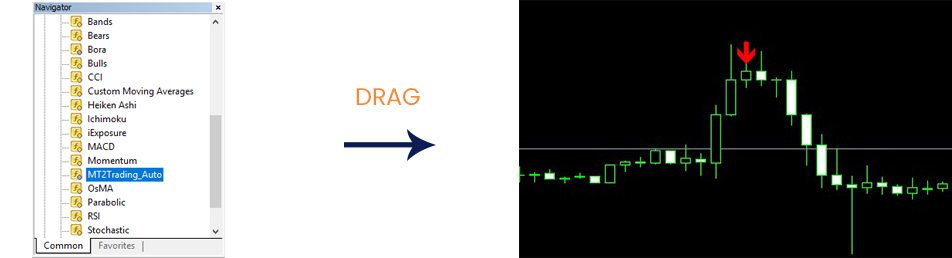
- Drag your signals indicator/template to the chart (in case you don’t have an indicator, we include inside the MT2 download files the “BinaryProfit” indicator as a courtesy.”
- Drag the connector file “MT2Trading_Auto” to the chart.
Customizable parameters
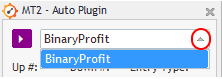
1. Indicator name
The name of the indicator is used to identify where the signals that will be placed in your account come from and to show their names on the trades table on MT2 Trading platform. The statistics and the historical data are also based and ordered according to the names of the signals you trade with.
Once you drag the connector to your chart with an indicator, you just have to click on the little arrow on the side and all the indicators on your charts will appear there.

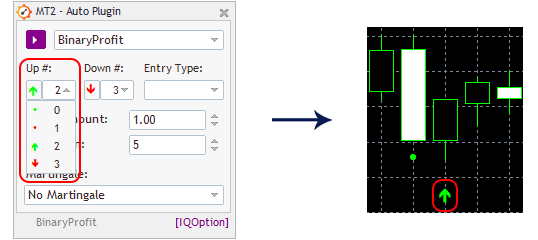
2. Up # (signal buffer)
Every MetaTrader indicator that generates signals in the form of arrows, points or other graphic signs, transmits the signal data in the so-called indicator buffers.
Once the connector identifies the signal indicator, it will automatically read the arrows or points of it and give you the option of configuring the buffers for the robot to place CALL or PUT trades for you.
In the “Up” buffer you must select which graphic resource is the one that will indicate to the robot to open a CALL trade in your account.
3. Down # (signal buffer)
Contraty to the UP buffer, the “Down” buffer will be responsible for identifying the signal from your indicator on your graph and open PUT trades for you in your account.
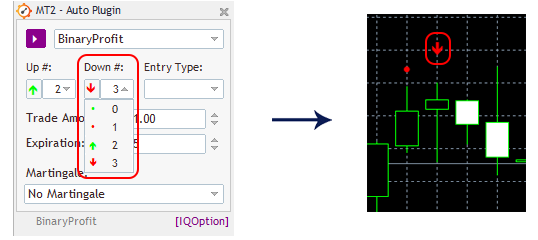
4. Entry Type
Once you have configured the signal buffers, you can choose between two types of entries: OnNewBar or Intrabar.
- On the new bar entry, the trade will be carried out at the end of the candle in which the robot received the signal (that is, at the opening of the new bar).
- On the intrabar entry, the trade must be opened immediately when the signal appears.
Most reverse indicators generate signals to enter on the new bar, while trend indicators commonly generate signals for the intrabar entry.
5. Trading Amount
This parameter allows you to set the amount of money invested on each trade.
In the example, we can see that the amount is “1.0” which means that each trade that the robot opens will be of $1 USD.
If you wanted to change the amount of each operation, you should just modify this parameter.
For example: For $5 USD, you should write “5.0”. For $ 10 USD you should write “10.0”, and so on…
6. Expiry Time
This parameter will alow you to set the temporality of your trades.
In the example, the expiration is set to “5”. This means that every operation the robot opens will automatically close 5 minutes after.
If you would like major or minor temporalities, just modify this number.
7. Martingale
By default the Martingale strategy is disabled.
To activate it open the menu where it says “No Martingale” and choose your preferred option.
If you would like to learn all about Martingale Strategy, click here
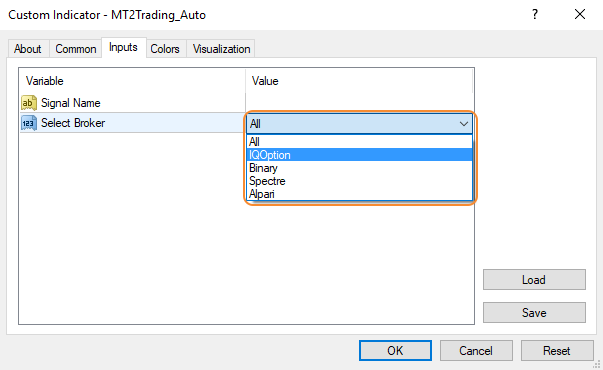
8. Broker
Finally, you must decide in which broker/s you want your trading robot to be placing trades for you.
By default, “All” is selected, meaning all the trades will be placed in all the brokers (as long as it has accounts of those brokers opened in MT2 Trading)
To modify this parameter and choose your broker you should follow the next steps:
- Within MetaTrader, go to the top-right menu and click ““Charts > Indicators List > MT2trading_auto”> Edit”.
- Click on “Inputs > Select broker > click on the small arrow facing down on the right”
- Select your preferred brokers and click “OK”
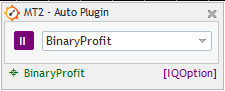
To temporarily stop the connector, you just can click on the “Pause” button and your robot will stop trading.
To have it up and trading again, you just need to click on the “Start” button again and your robot will continue trading.